
My own production company indent
Blog Post #59
After researching production company indents, I decided to design my own indent whilst using the program PhotoShop CS6. This is an amazing software which enables you to create your own logos including custom fonts, shapes, colours etc whilst having multiple layers.
So we wanted something plain but effective for our production company indent, so as a group we decided to go with the name 'Evolution Films', furthermore we didn't want to overcomplicate the design so we decided to chose simplistic colours such as black and white.
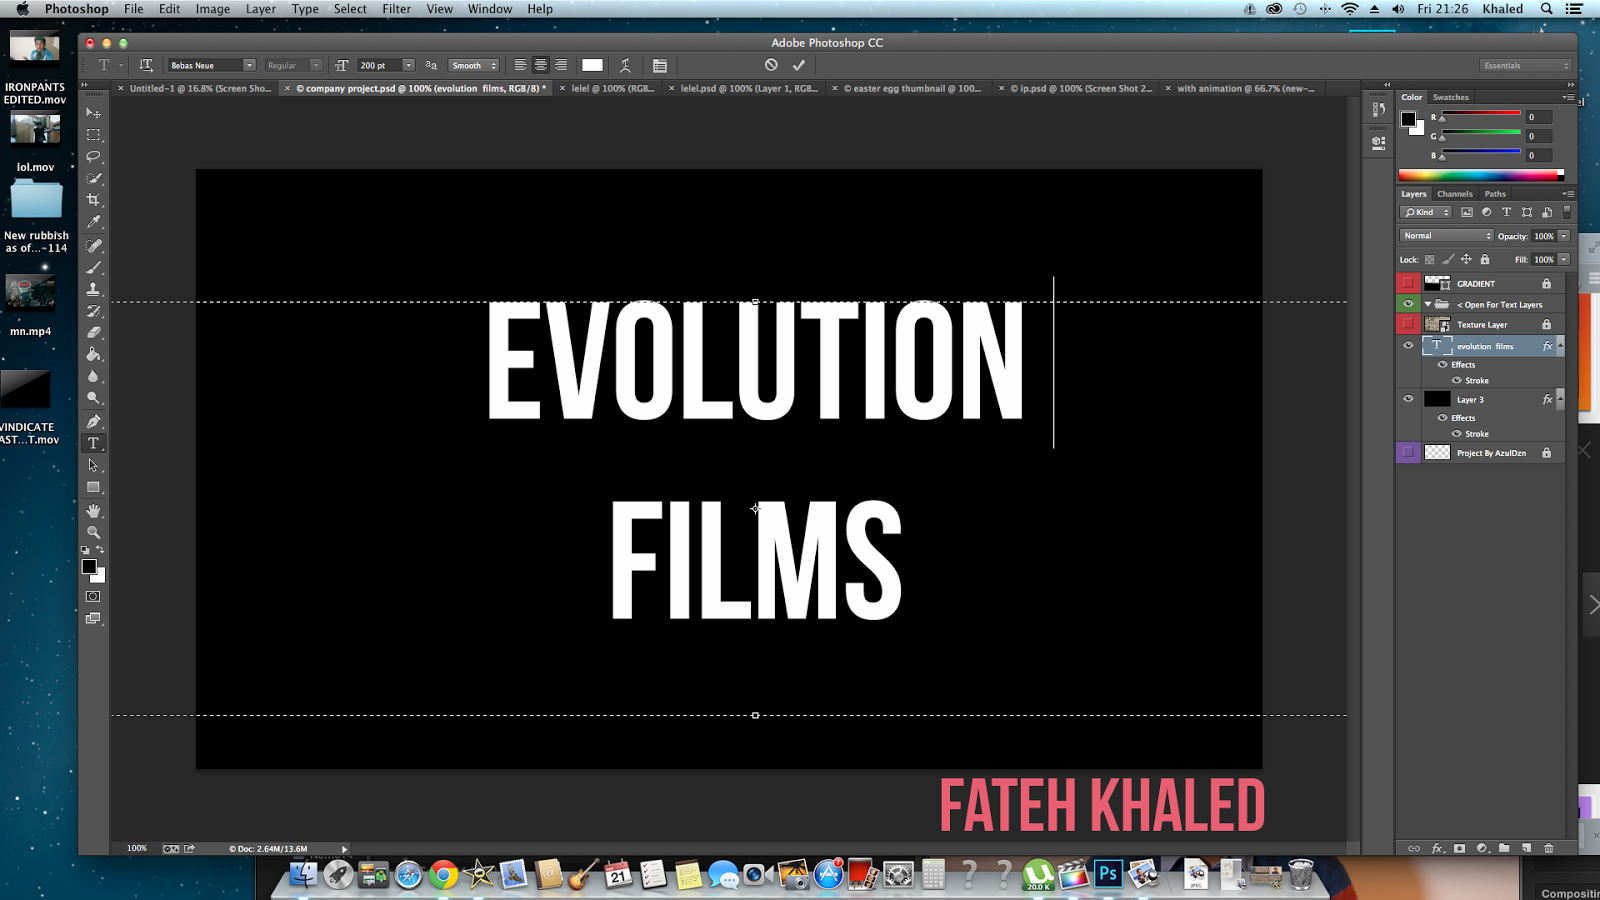 |
| Screenshot of my production company indent in progress As you can see the image shows my production company in progress, PhotoShop enables you to have multiple layers which makes logo making easy and presentable. The process began by myself selecting a new document and entering the pixels: 1280 x 720. I had to ensure the pixels were at 1280 x 720 because that is the aspect resolution for High Definition films, so by putting the aspect ratio to this it means that the production company indent will fit with the recorded footage with the canon 700D. The text box on the right allows you to enter font of your choice, allow PhotoShop is already pre-installed with hundreds of default fonts, I wanted our font to be even more unique. So I decided to go on a website called 'DaFont.com', which has many more custom fonts and chose one that stood out. The font which I ended up using is called 'Bebas Neue', this was done by downloading the custom font and importing it onto the mac. 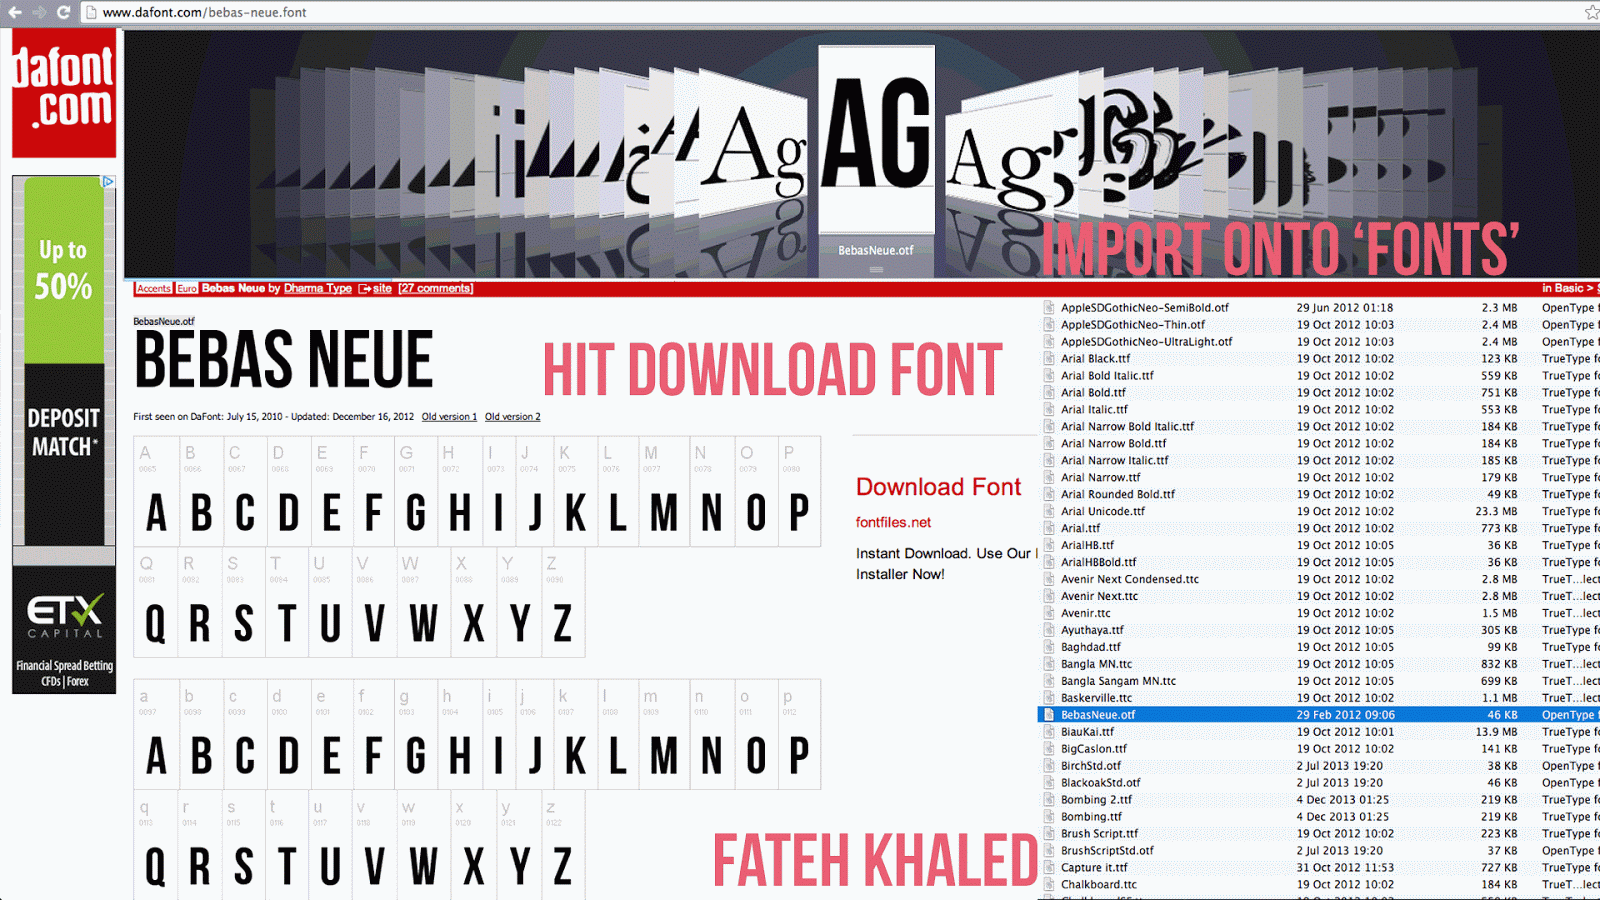 After importing the font I made the background black as this was the chosen colour, I also added a new layer writing out 'Evolution Films', soon after I added a line in between the two words to make it look more aesthetically pleasing but not over complicated. After completing the production company indent, it was time to render the image out, this one done by click on 'File', 'Save Image As...', 'JPEG', the image was rendered out as a JPEG image because it it is a supported file which can be easily imported into the opening title sequence timeline on Adobe After Effects. I also saved the image as a PSD (PhotoShop Document) file so that I can come back and edit it accordingly if any slight alterations are needed to be made. |
No comments:
Post a Comment